- de
- en
En:pulte
Table of Contents
Media Lecterns
The central seminar rooms and pools of the Institute of Computer Science include special lectern desks with audio and video connections for the projection and playback of audio/video media content. The following explains their usage in more detail.
Connecting Laptops
| Connections | Connections (large lecterns) |
|---|---|
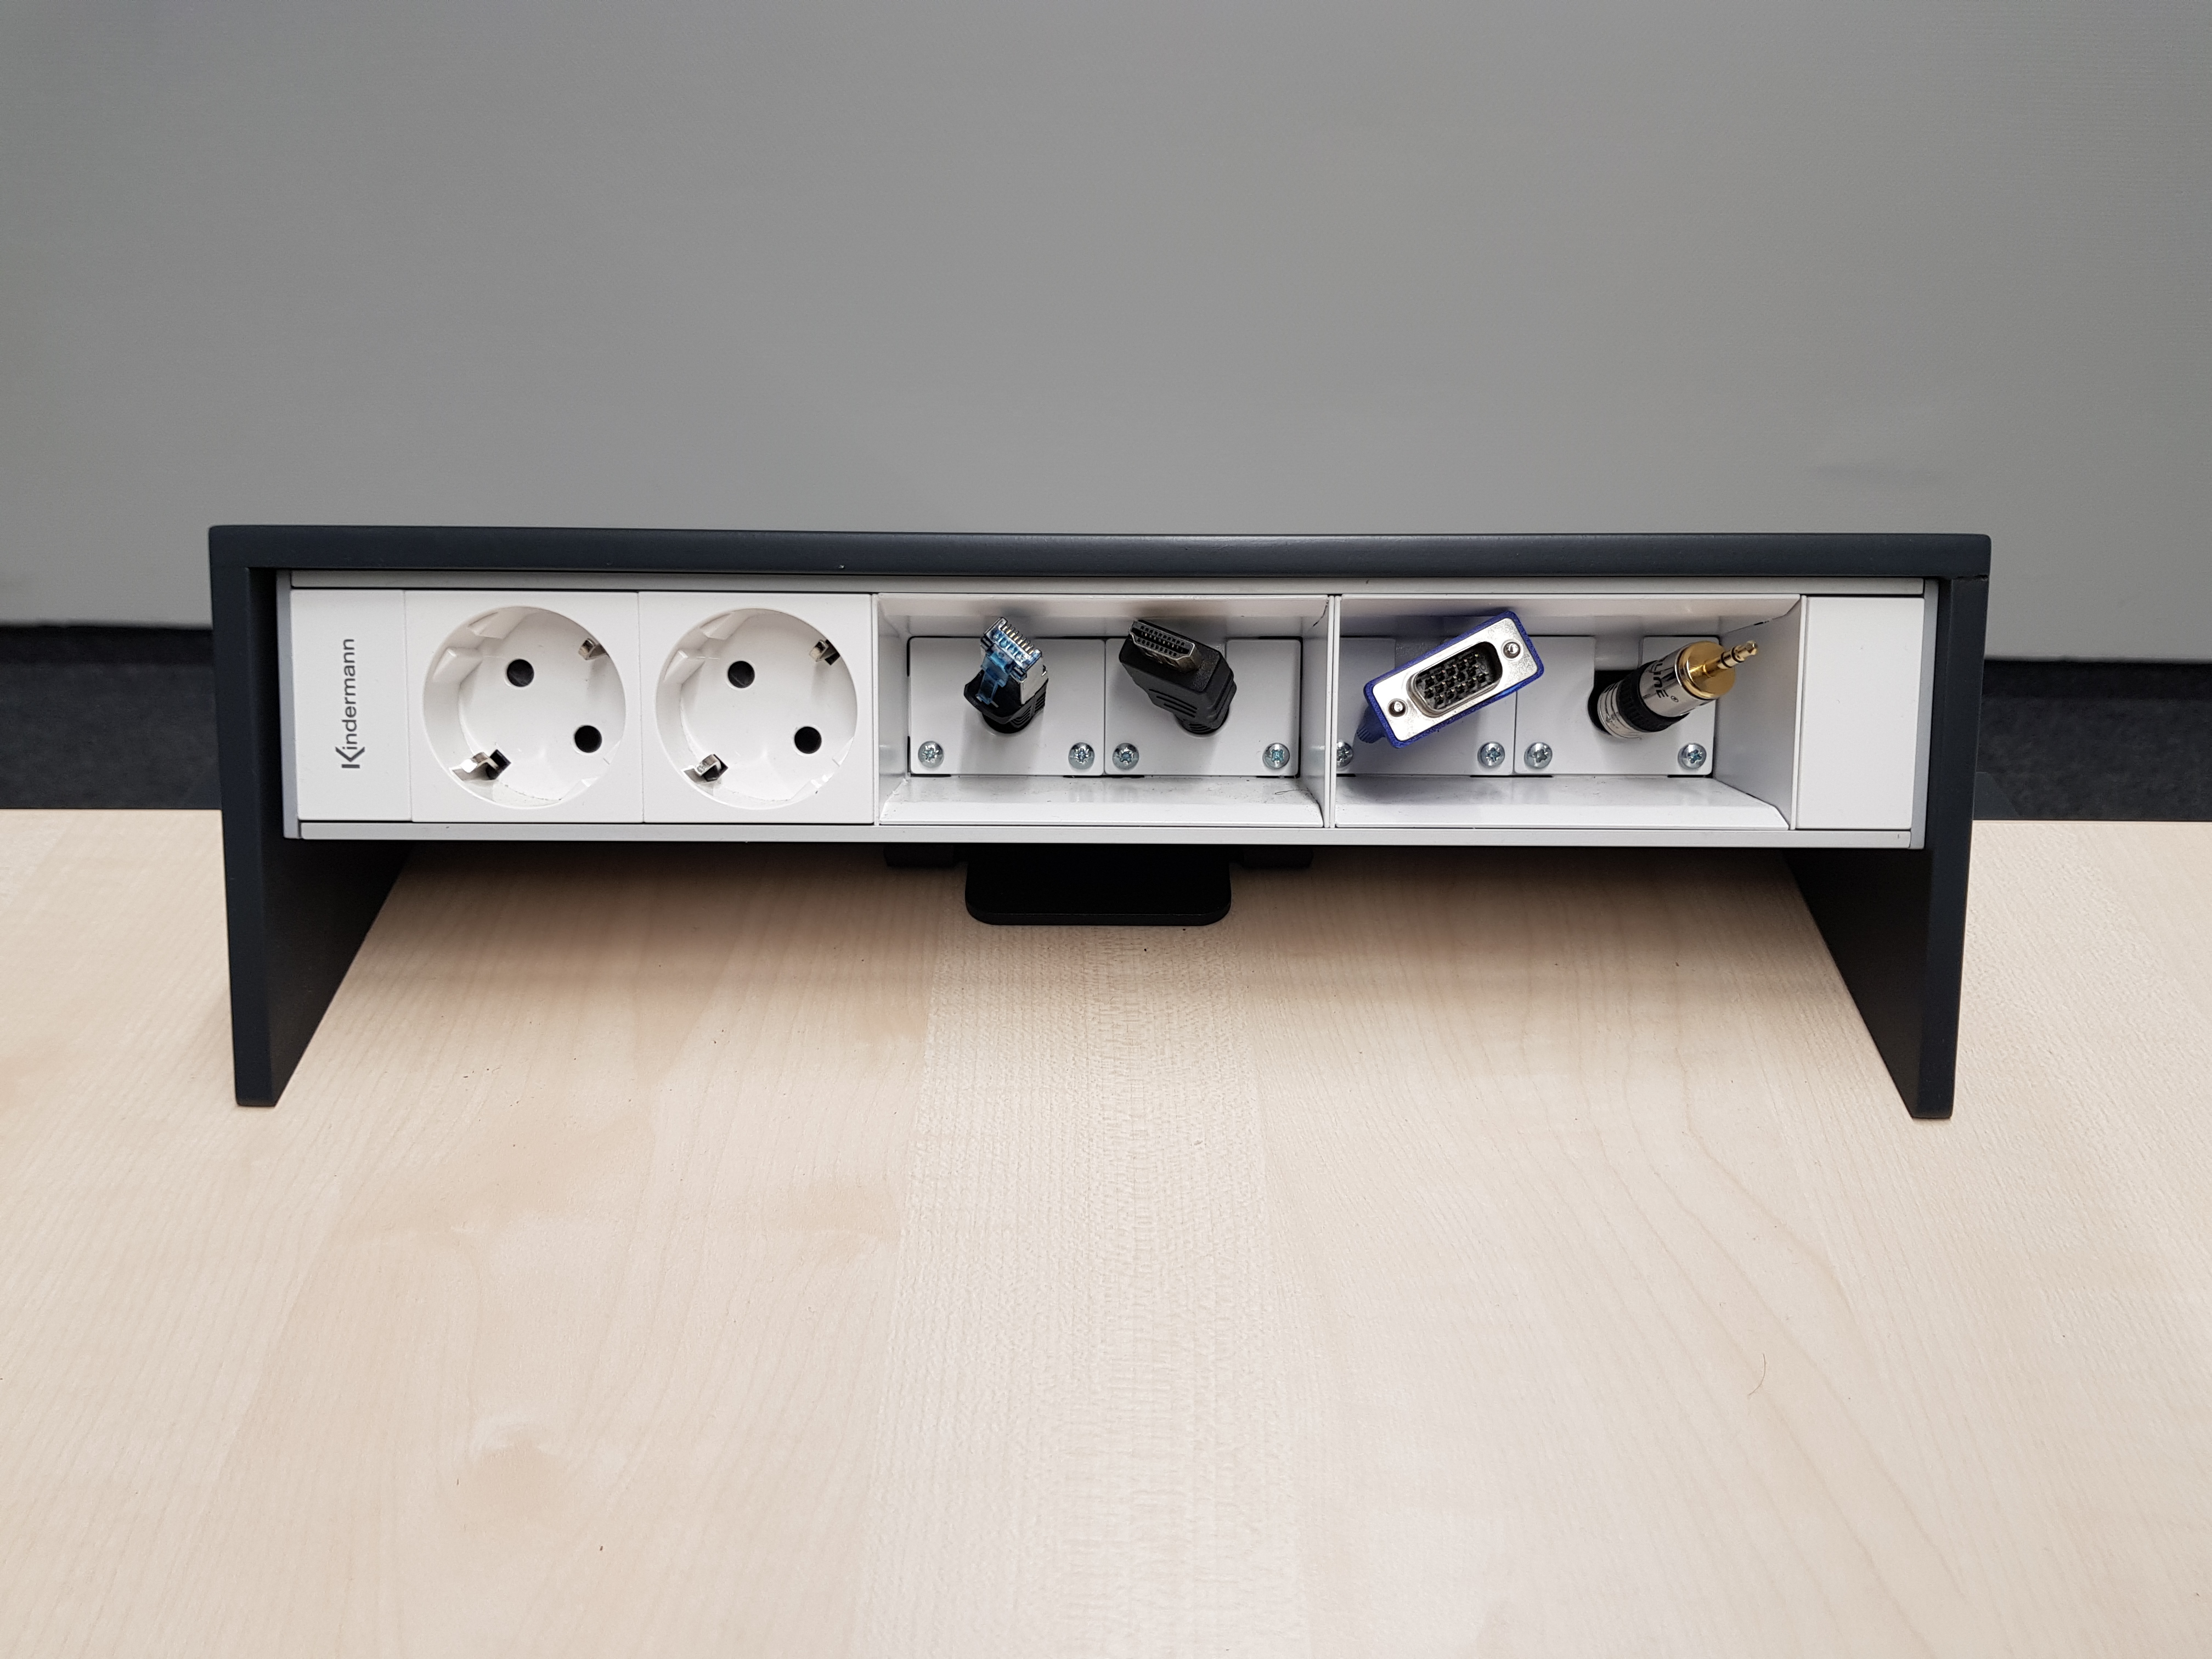 | 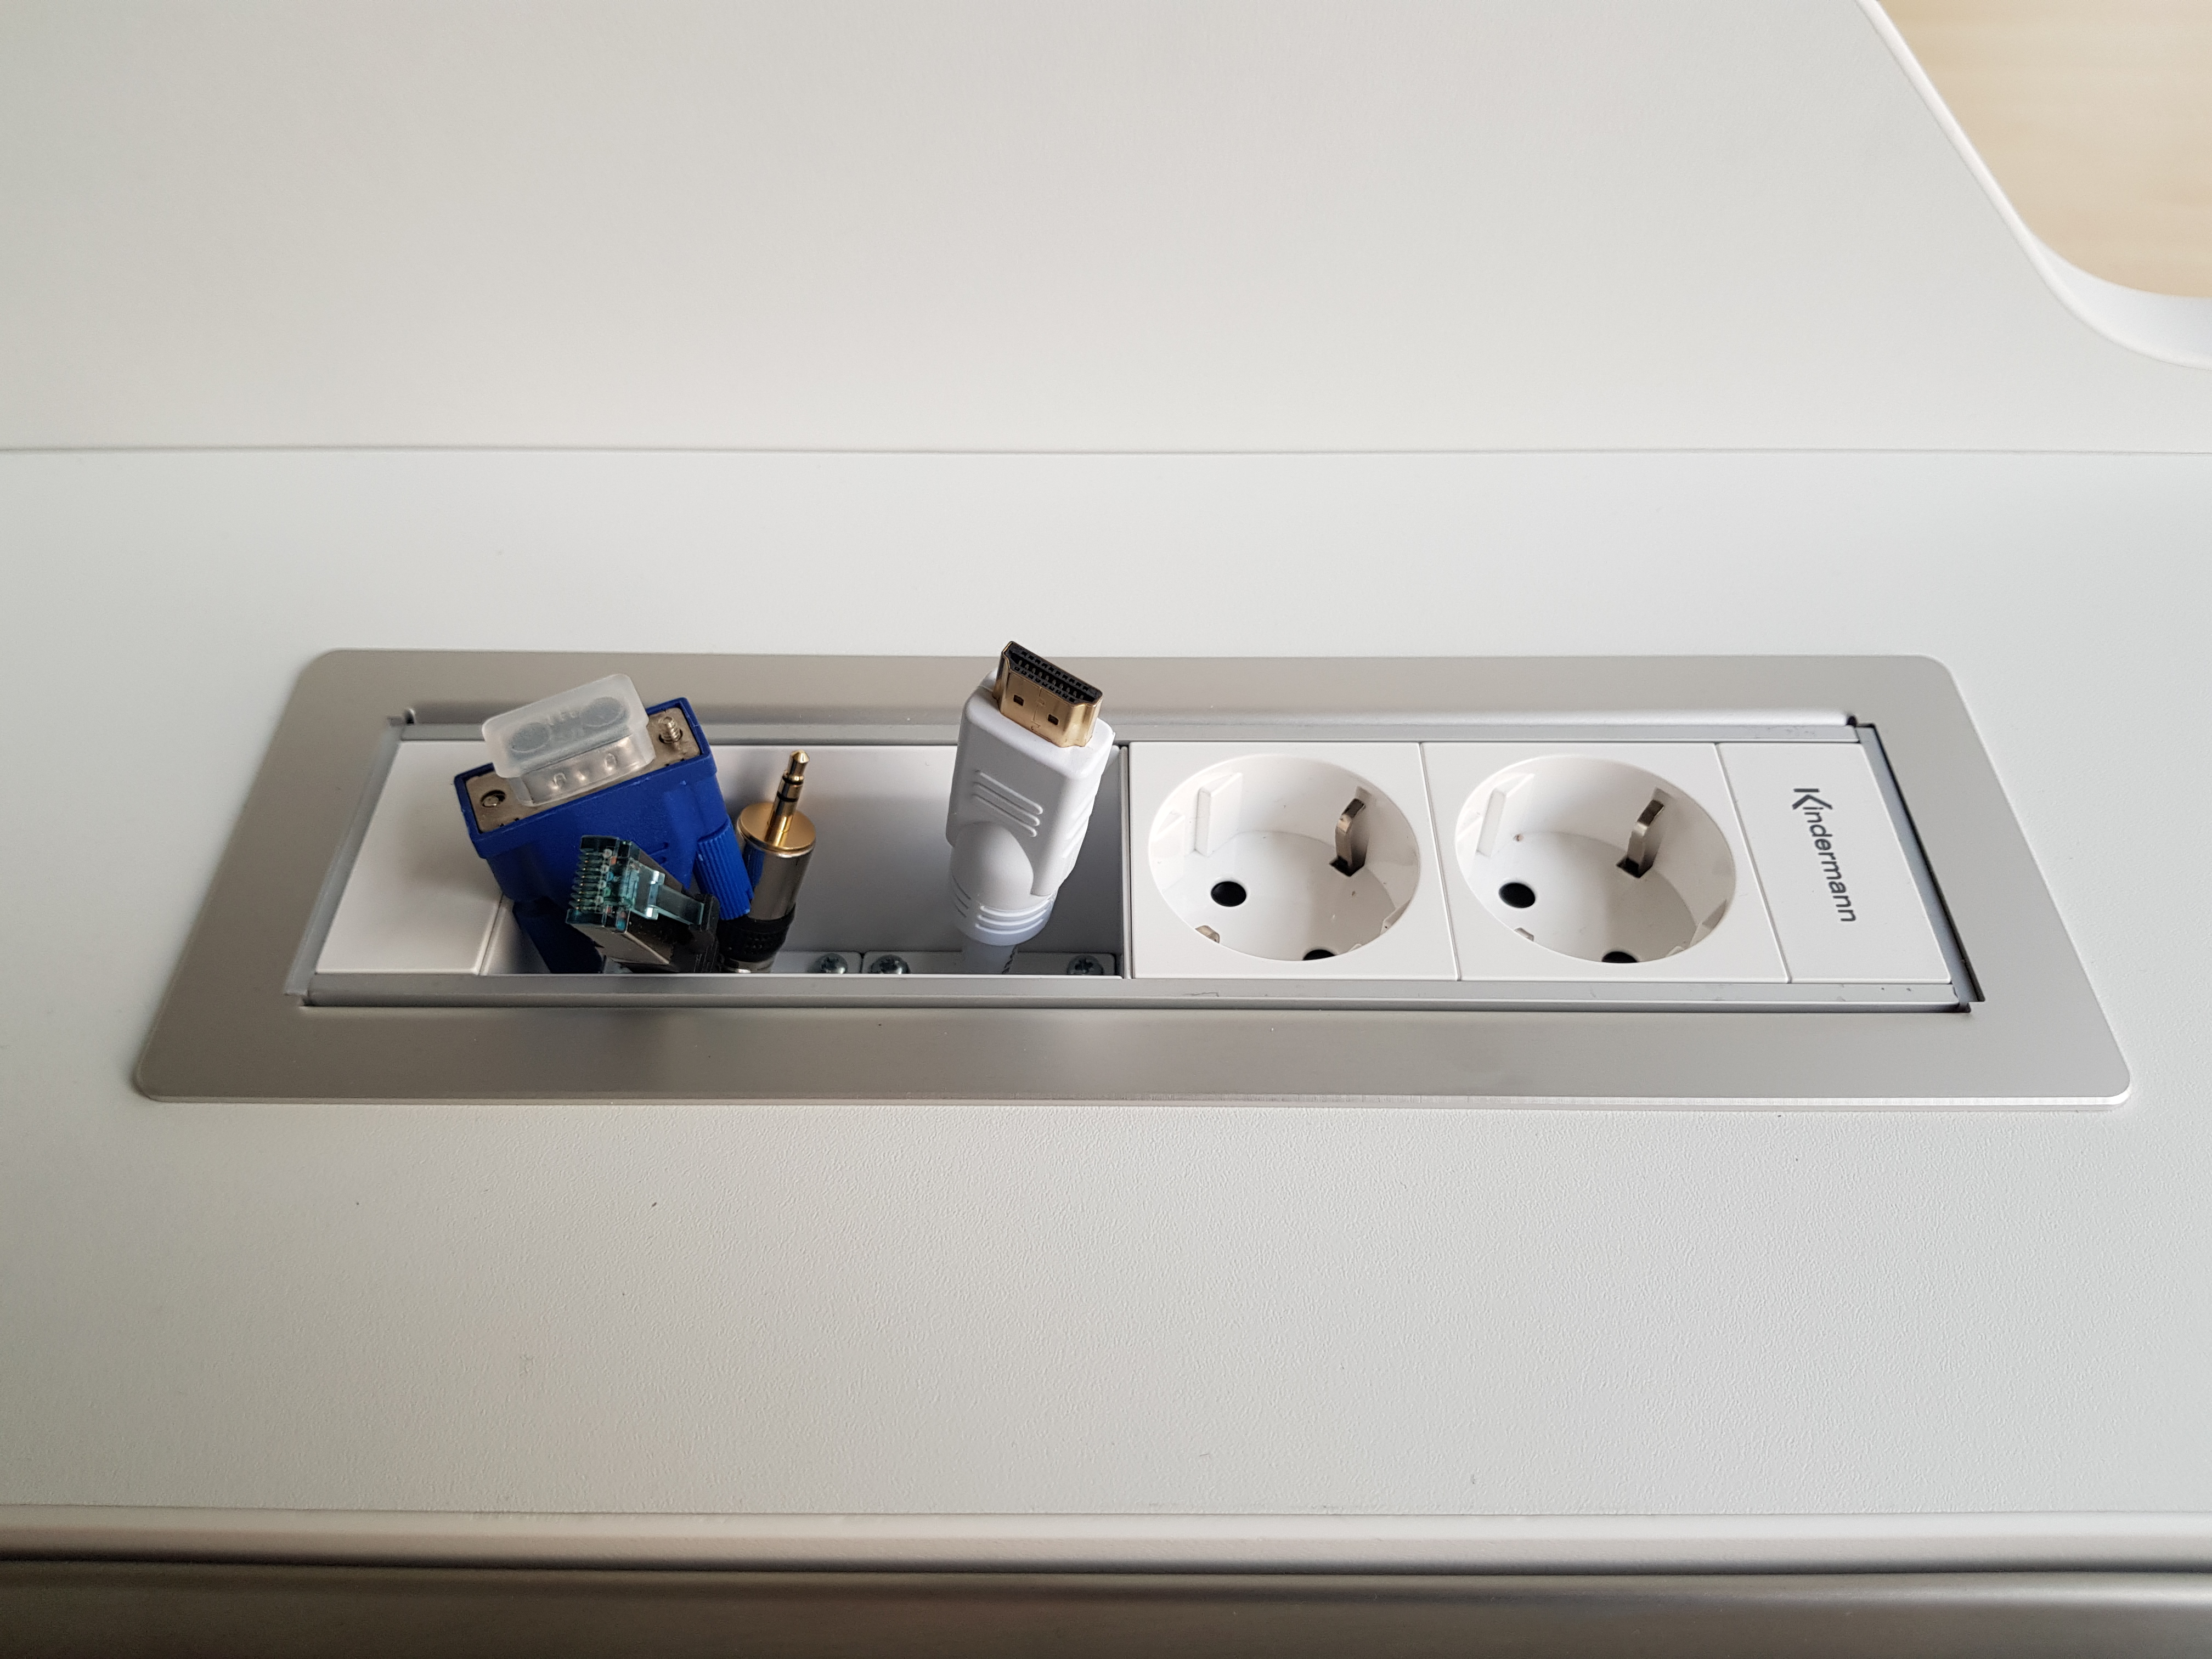 |
HDMI (recommended)
Connect the lectern's HDMI cable to your laptop's HDMI output. The Scaler will activate the projector and your laptop's video signal should be displayed within a few moments. HDMI-Audio signals will also be put out via the room's speakers.
To ensure the best possible compatibility, please try to use a laptop with a real HDMI port without any converters.
VGA & 3.5mm audio jack
If your laptop doesn't have an HDMI output, you can alternatively use VGA to connect your device to the projector, as well as the 3.5mm audio jack to connect to the speaker system.
Switching inputs and turning off
 |
Switching between inputs happens automatically.
If you're using two devices on different inputs at the same time, you can manually switch between the inputs using the buttons 1 (HDMI) and 5 (VGA) on the scaler.
Please note that it is not possible to combine HDMI video with analogue audio; using HDMI for video also means having to use HDMI audio.
After use just pull the plug off your media device again and carefully push the cable back into the tank. The projector will be switched off automatically after about a minute without a video signal.
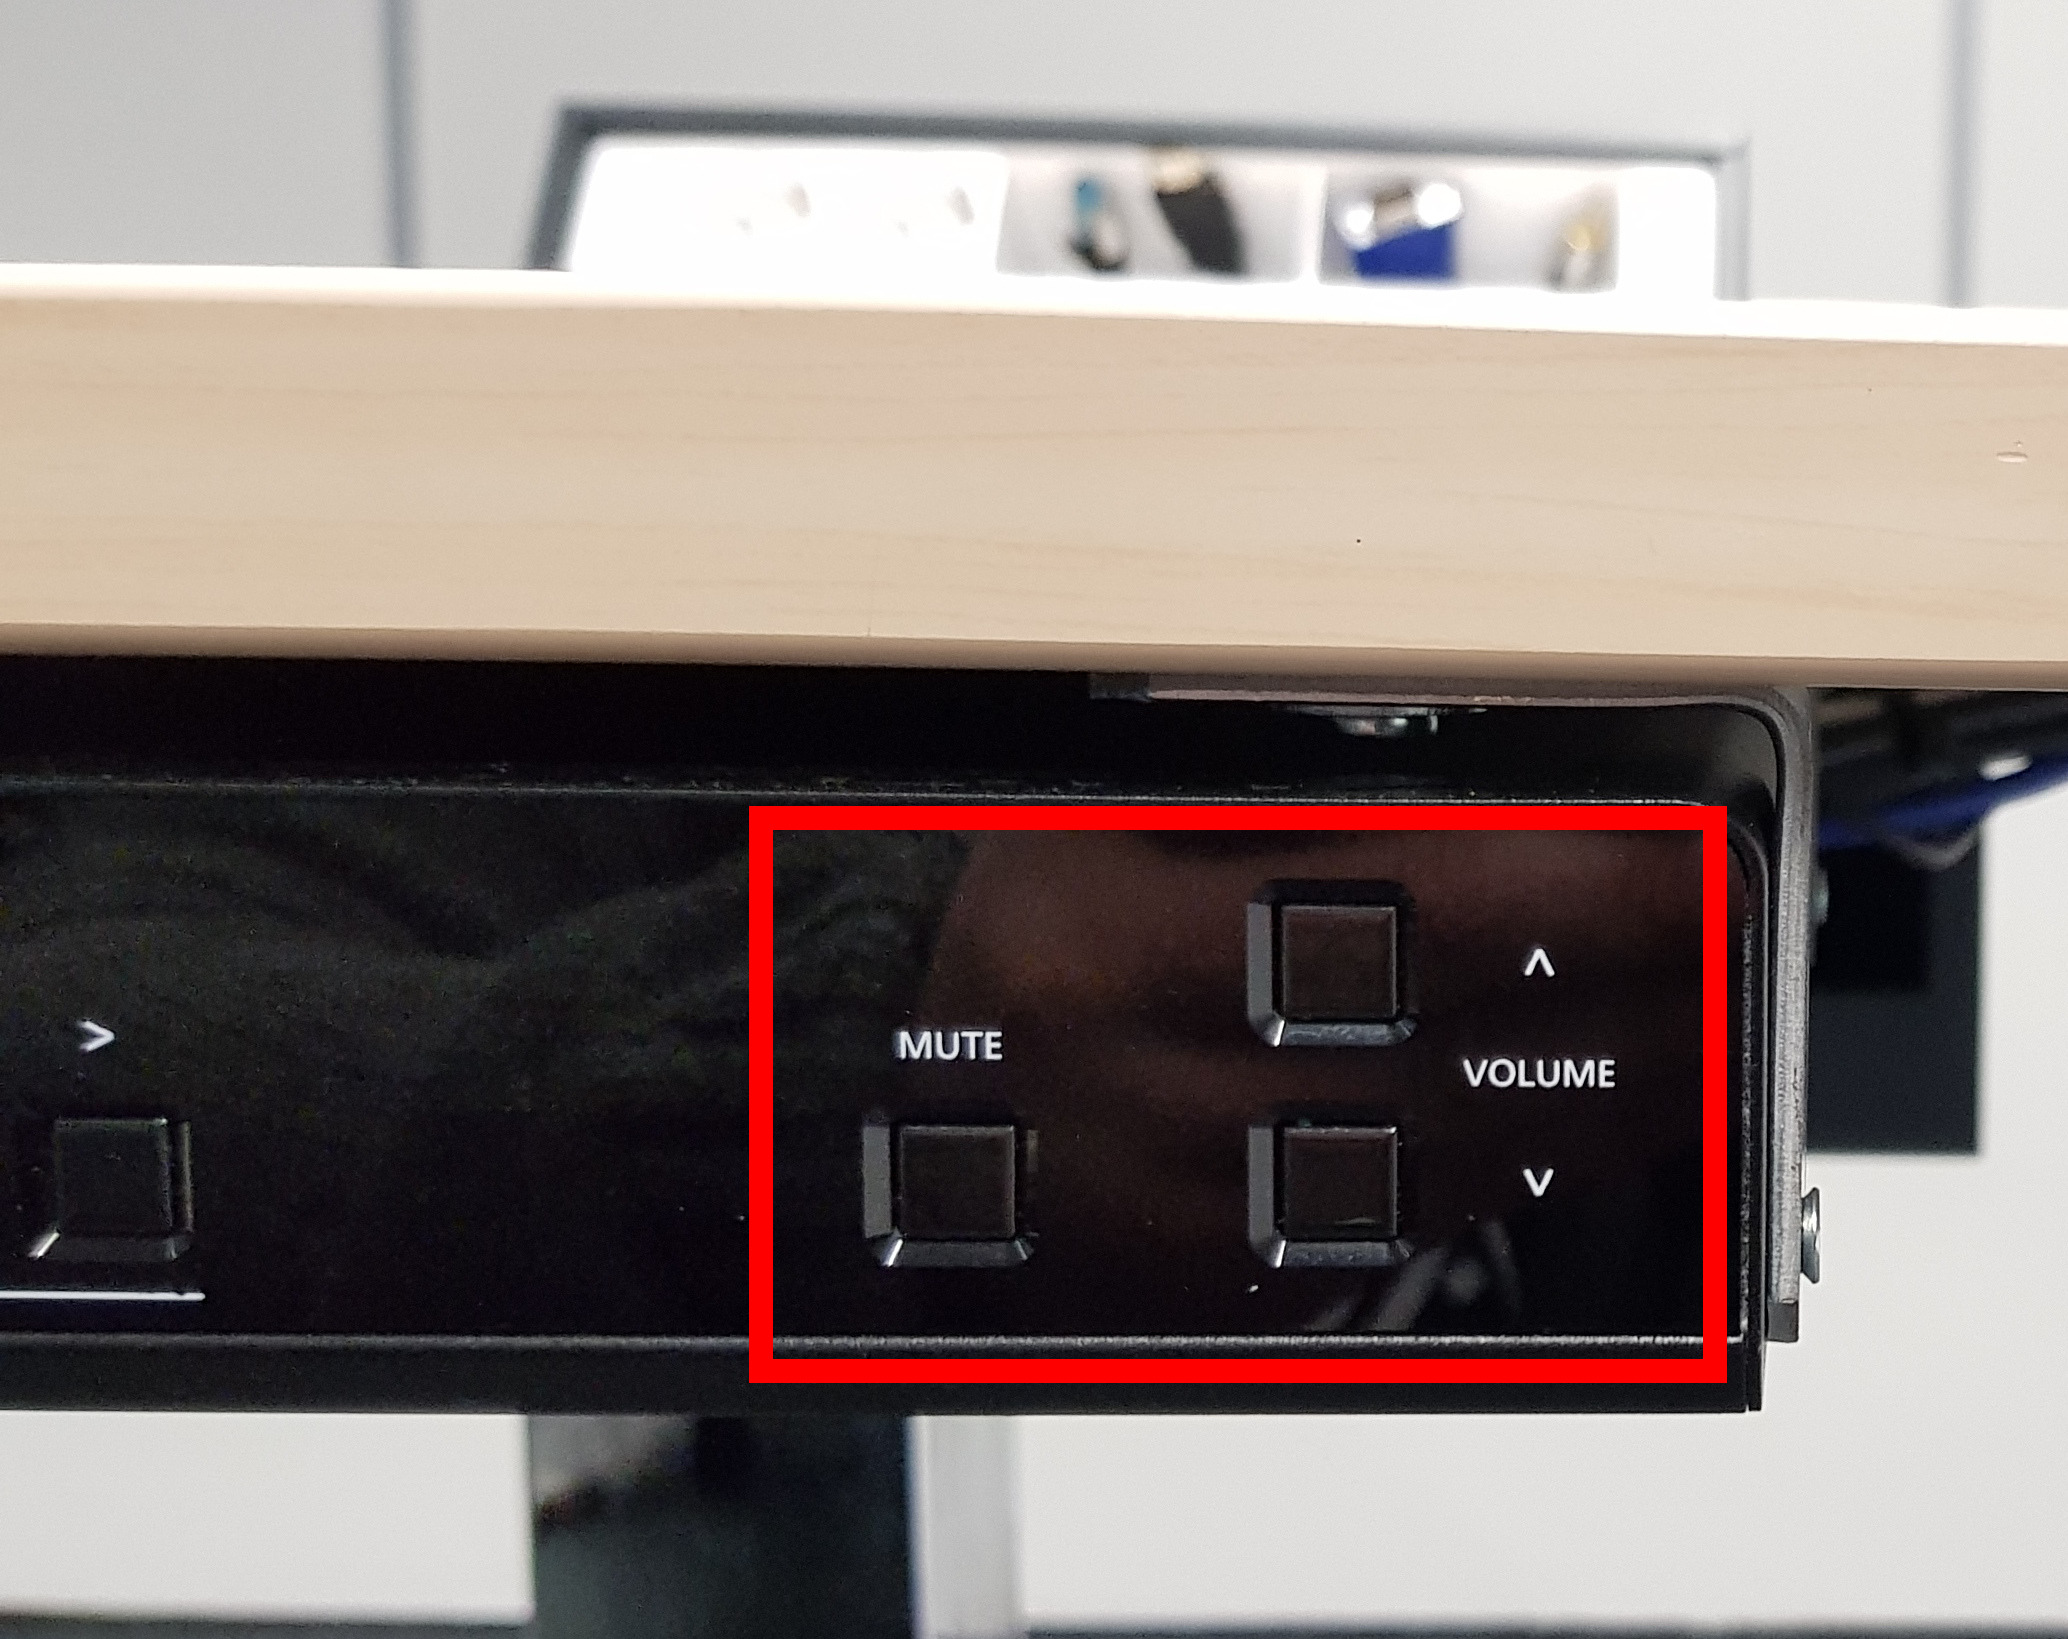
Connecting Audio Inputs and Volume Control
Audio inputs will be connected through HDMI or the available additional audio cable (if using VGA). On the front panel of the scaler there are controls for volume and audio mute (marked red on the picture below). There will be immediate optical feedback in the projector picture while using these controls. Please note that you have to use the VGA connection if you plan to utilize the separate audio-plug. This connection is not active while using the HDMI connection.
 |
b-it lecture room (0.109)
The lectern in room 0.109 has additional volume controls.
Channel 3 is the audio provided by your laptop or similar device (connected via HDMI or the 3.5mm audio jack). Channel 4 is the built-in microphone on the lectern. Each channel can be individually turned on or off using the buttons on the left of the volume knobs.
Height Adjustment
The lecterns' height can be adjusted. The smaller ones use a gas spring, similar to office chairs. The big ones use an electrical system.
| Variant 1 (small) | Variant 2 (large) |
|---|---|
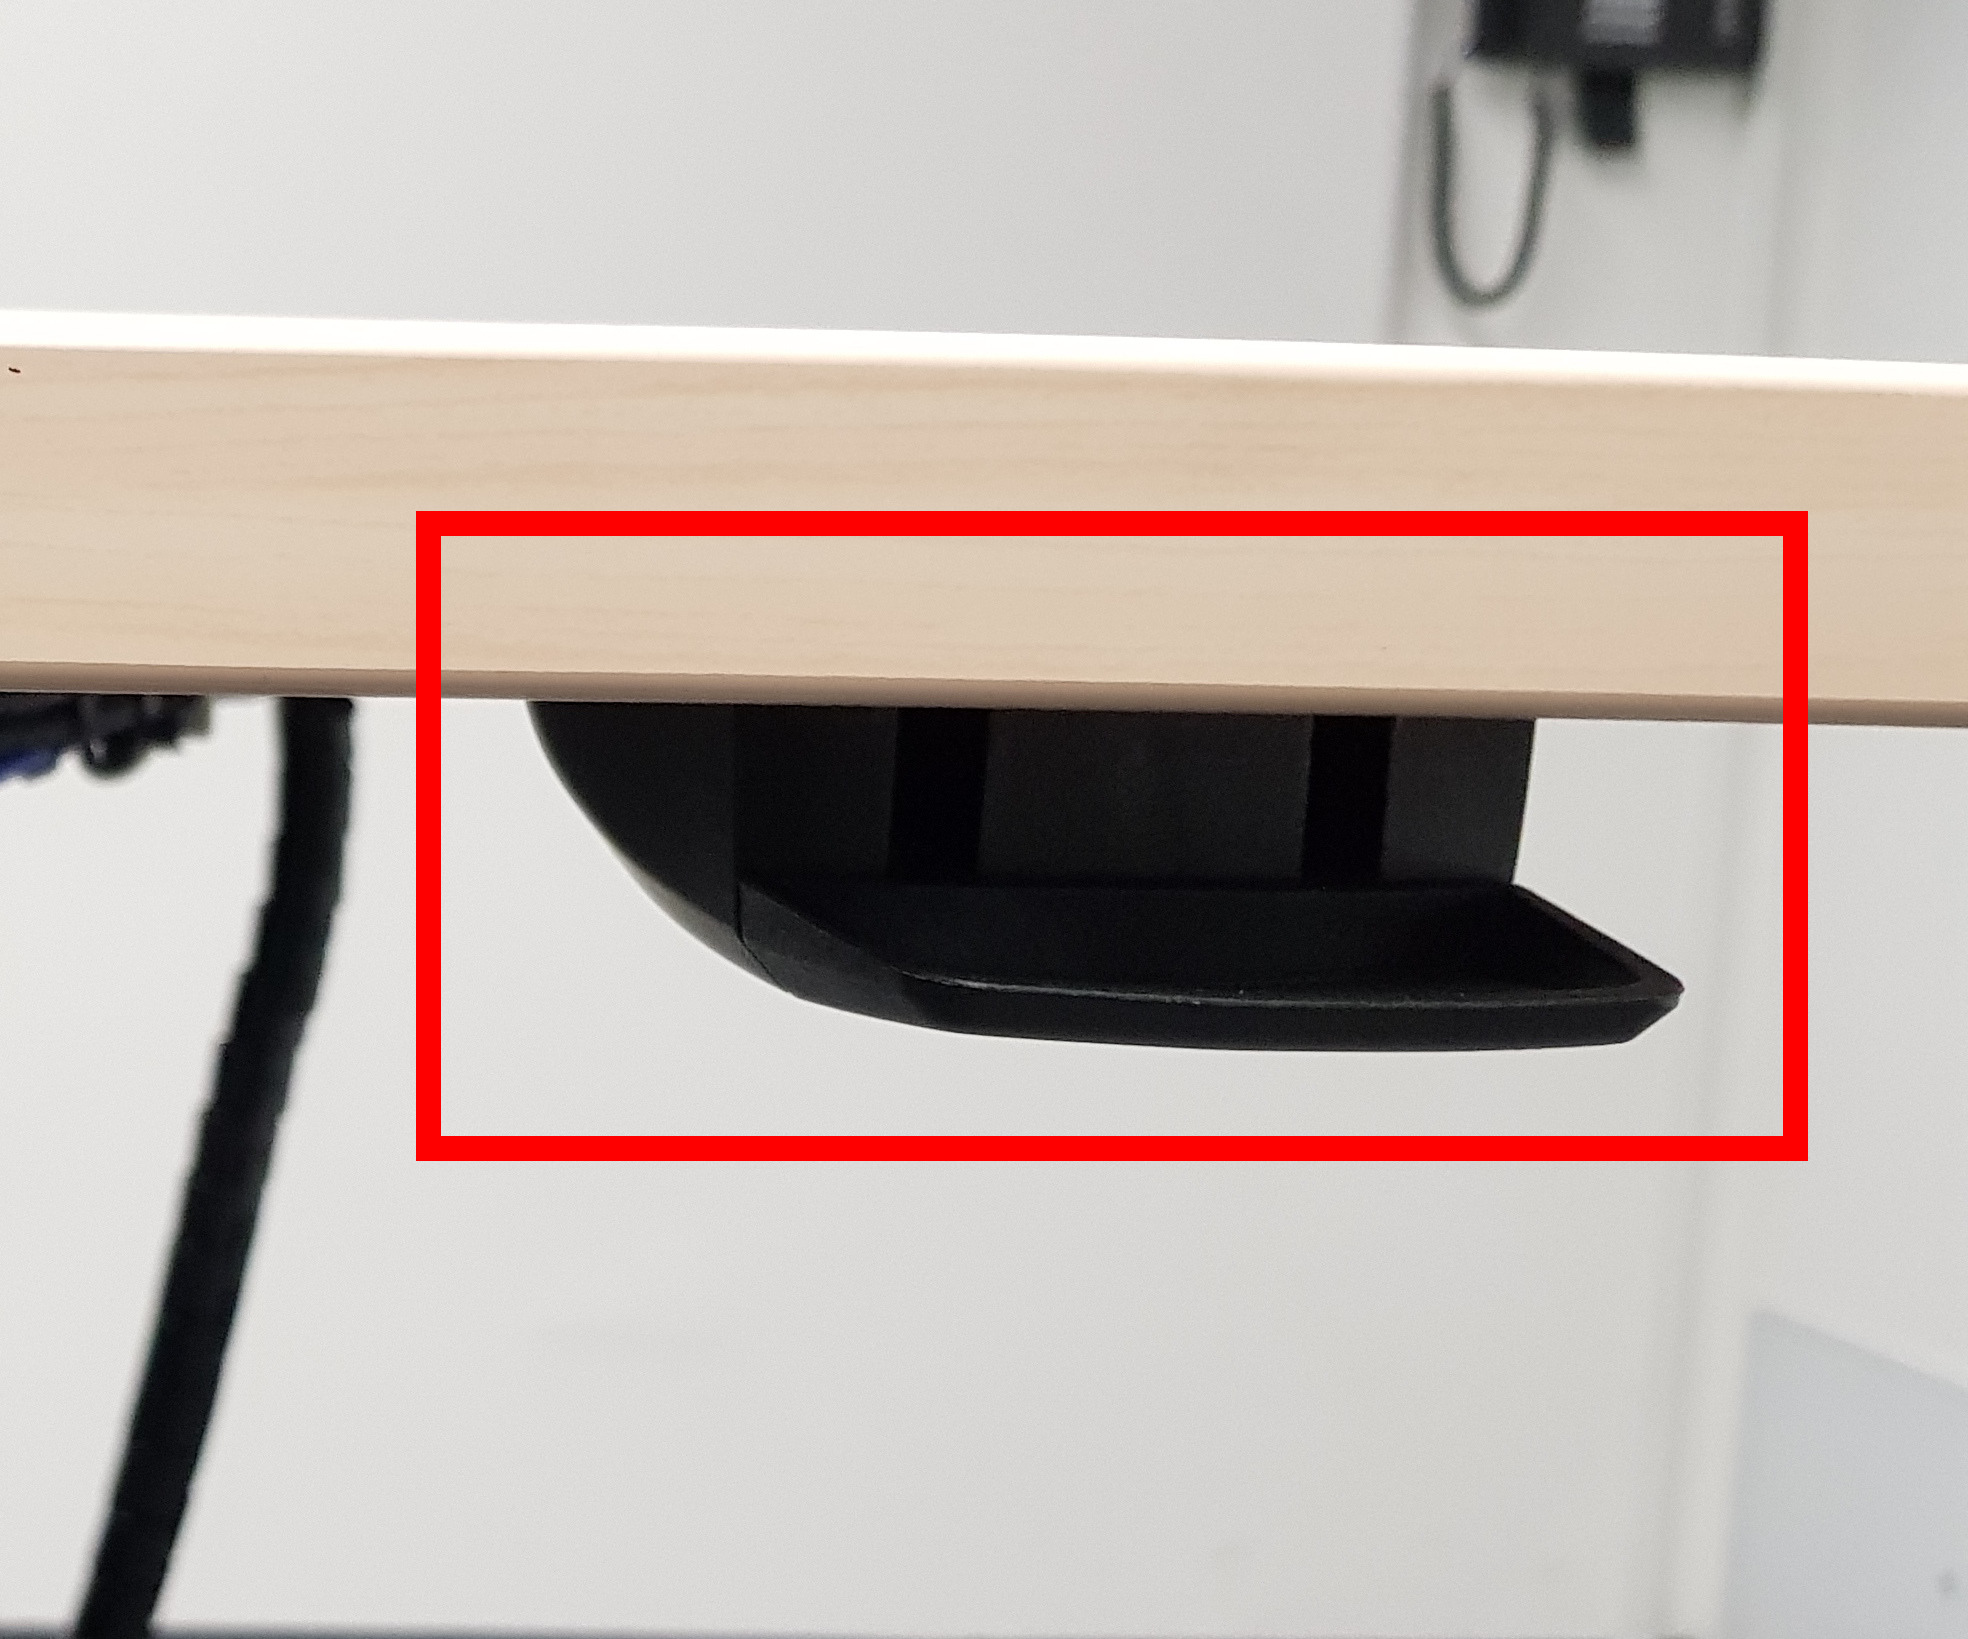 | 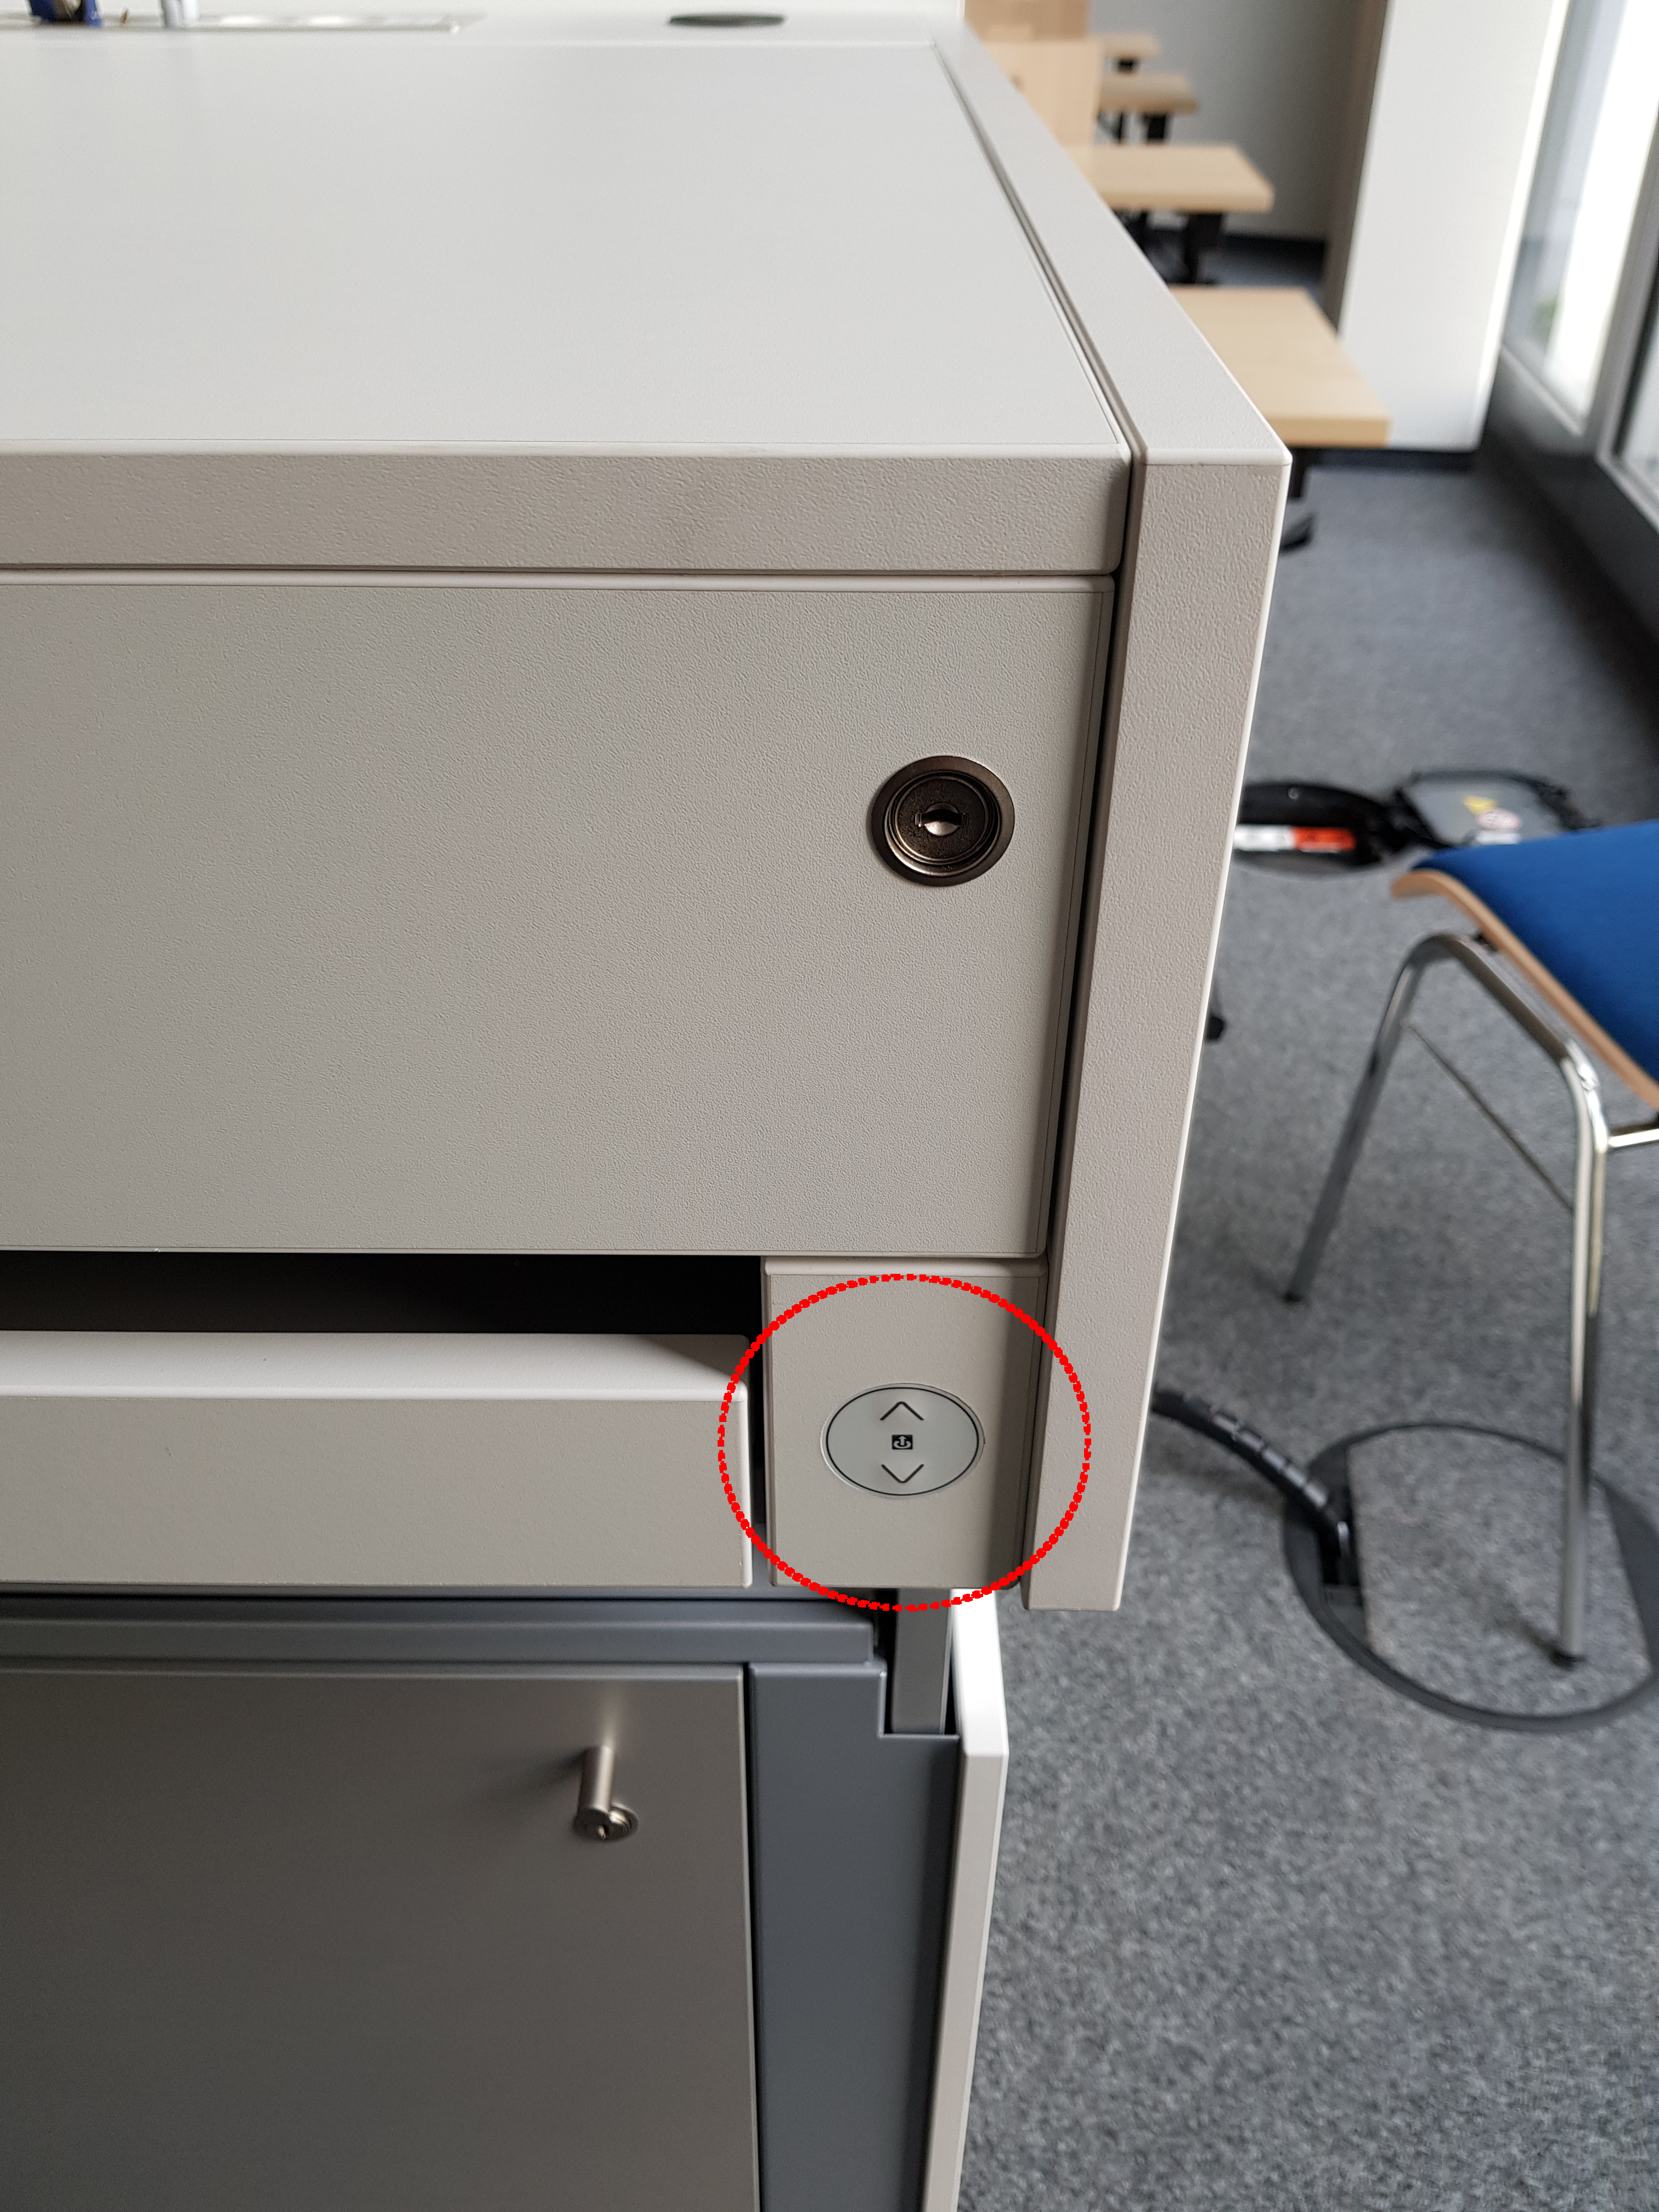 |
Adjust the normal version by pulling the locking handle towards the table top (marked red in the picture above) and carefully push the plate downwards or pull it upwards. Release the locking handle as soon as the desired position is reached.
The large console version can be easily adjusted by pressing the corresponding direction button (marked in red in the picture above).
Microphones
All lecterns can be equipped with microphones. The large variants have the options of a console microphone, a wearable and a portable microphone rod that can be borrowed at the GSG in the rooms 0.009, 0.010, 0.014 and 0.015 if required. The smaller lecterns have a mounting space for a wireless microphone unit, which can also be borrowed on demand in our offices. Please allow some time for the necessary preparation of the lectern when choosing this option.